Author Topic: How To: Build a Basement Under a Foundation  (Read 4483 times)

MrsFlynn

  • Forum Goddess
  • Administrator
  • Ultimate Townie
  • *****
  • Posts: 2902
  • Come to the dark side... We've got cookies 🍪🍪 ☕
How To: Build a Basement Under a Foundation
« on: June 18, 2021, 08:34:01 PM »
Table of Contents:

    ✦ H2B ~ Floorplan Setup
    ✦ H2B ~ Creating Stairwell to Basement
    ✦ H2B ~ Placing Stairs In Basement
    ✦ H2B ~ Placing the Foundation
    ✦ H2B ~ Drawing Out the Walls
    ✦ H2B ~ Building the Basement
    ✦ H2B ~ Finishing the Basement

    ✽ Warning: Photo heavy thread. Click images to see larger view.


Note: This how to is best used when you've got a basic floor plan in mind. First floor plan is good. Say, for example you have this in mind for a floorplan -


However you want to add a foundation and basement, so something like this: (The different colored wood floor is explained below)


MrsFlynn

  • Forum Goddess
  • Administrator
  • Ultimate Townie
  • *****
  • Posts: 2902
  • Come to the dark side... We've got cookies 🍪🍪 ☕
H2B ~ Floorplan Setup
« Reply #1 on: June 18, 2021, 10:18:36 PM »
1. Pick lot, and go into Build Mode > Terrain Tools and Flatten Lot.
- I do this so it works better when trying to lay down the foundation.


2. Use the free wood flooring to plan out your rooms and spaces.


Using different colors of flooring to flesh out the floorplan the way you want it.


1. Entryway
2. Main Bathroom
3. Stairwell to Basement
4. Extra Room
5. Bathroom
6 and 7 - Bedrooms
8. Kitchen
9. Living room
10. Bar Space
11.Dining room

Tip#1: Use walls if desired to get a better idea of how you want the layout to be and where you want the staircase to go.


** If walls are used, they may need to be deleted before stairs can be placed.

----

How I make space for my stairs:

I usually make an L shape, with the longer part (6x2 squares) going down to basement and the elbow part of the L for the landing and it's stairs from the foundation (2x1 squares).


MrsFlynn

  • Forum Goddess
  • Administrator
  • Ultimate Townie
  • *****
  • Posts: 2902
  • Come to the dark side... We've got cookies 🍪🍪 ☕
H2B ~ Creating Stairwell to Basement
« Reply #2 on: June 18, 2021, 10:37:05 PM »
3.) Using the basement tool, Make the stairwell to basement a little longer and wider than where you want the stairs to be. In my example I draw out where I'm going to be putting the staircase. Then I draw out some room on all sides of the staircase.

6x2 for main staircase
6x2 to the left and right of staircase

Then depending on which way I want the basement stairs to go, I draw out another 6x2 space in front. -- In total I made a 6x8 basement to place the stairs in.


Doing this makes sure you have enough routing space on all sides of the stairs when they get placed. As seen in photo below.

Tip#4: Use the Go Down a Floor button to go get to the basement to check your work. You should have an 8x6 room in the basement at the moment. Use Go Up a Floor to go up to ground floor.


Tip#5: Leave a little extra room for the stair landing - from the foundation to landing, then landing to basement.

 -- I used the orange free wood flooring to show the example of what space to leave, as shown in the photo above.

MrsFlynn

  • Forum Goddess
  • Administrator
  • Ultimate Townie
  • *****
  • Posts: 2902
  • Come to the dark side... We've got cookies 🍪🍪 ☕
H2B ~ Placing Stairs In Basement
« Reply #3 on: June 18, 2021, 11:36:57 PM »
4.) Remove all the walls if used before placing stairs, but leave the free flooring as a floor plan guide. The reason being is that stairs won't place with walls being in-place.

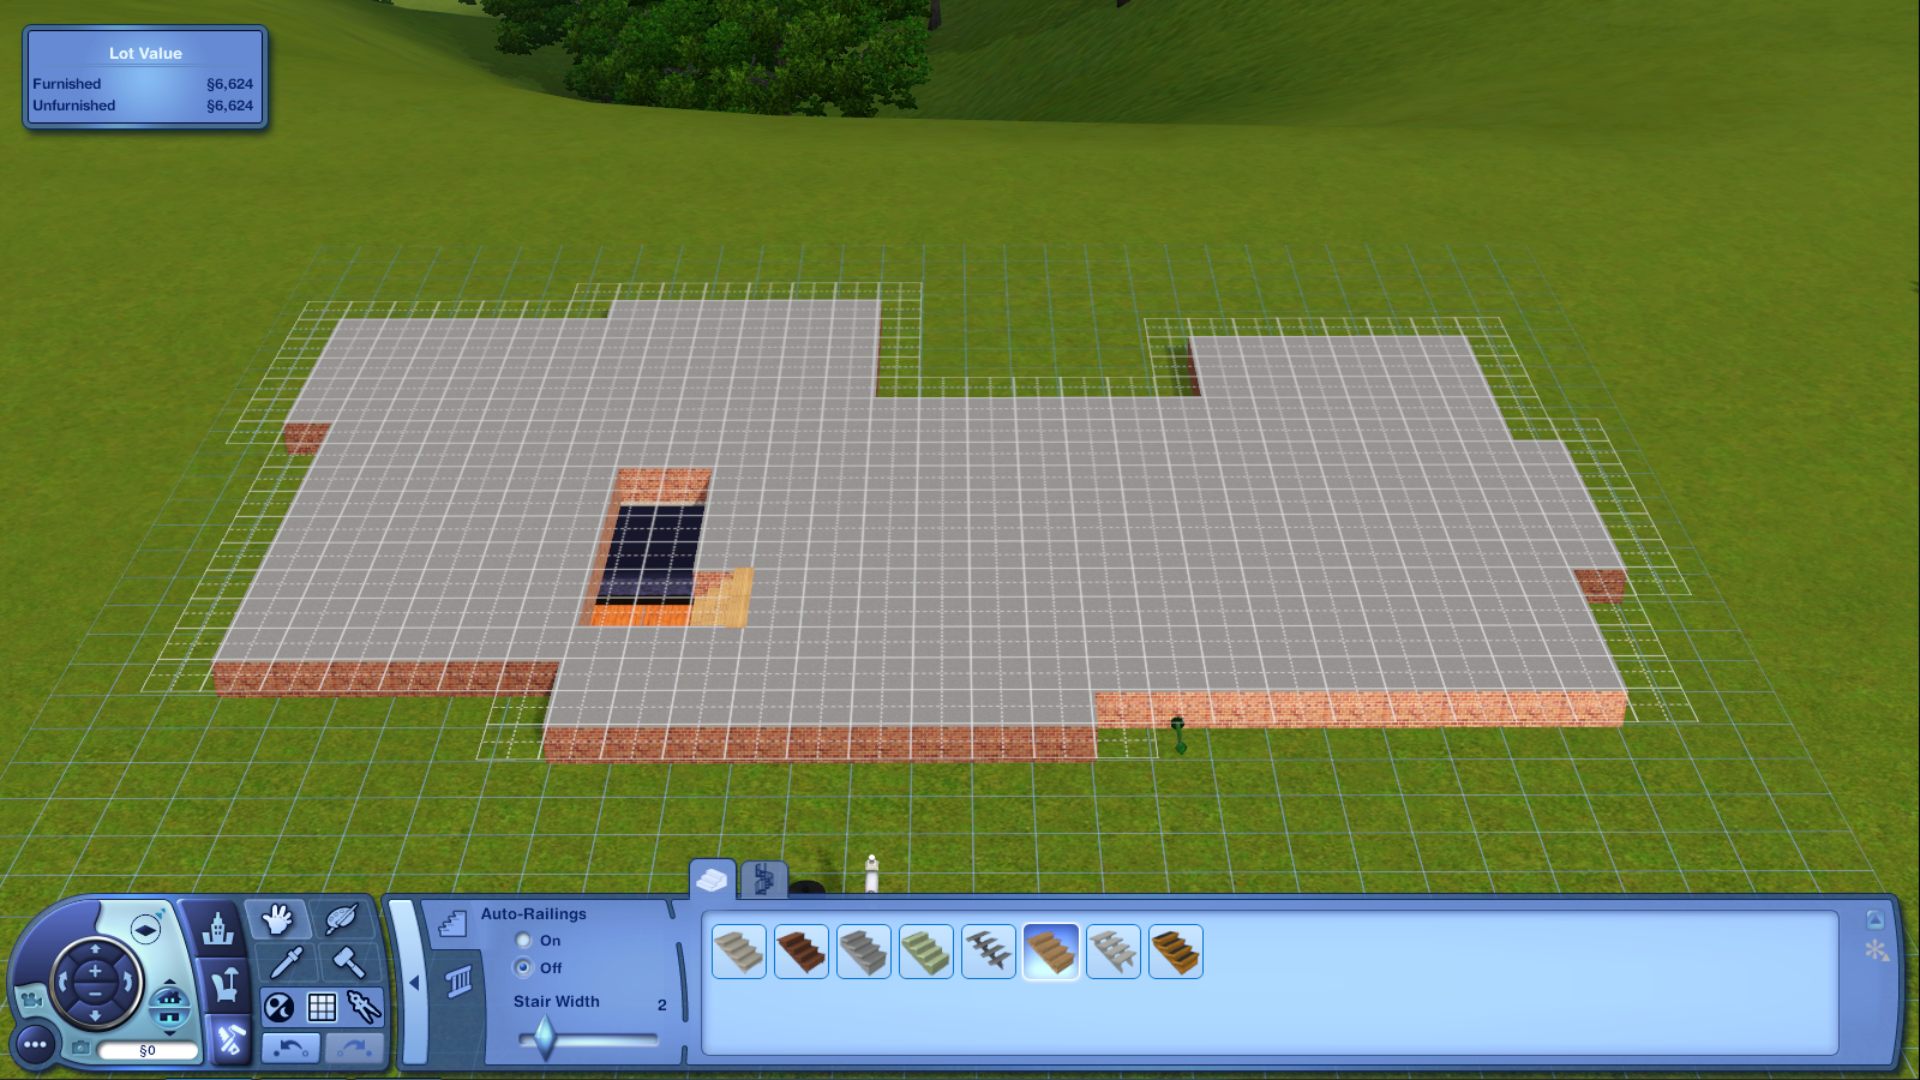
5.) Easiest way to place stairs is to go to basement level. I set Auto-Railings off, so I can place my own later, and Stair Width to 2. (Use the Arrow keys to rotate stairs.)

Pick the stair style you want, then place them. In this case, I placed them 2 squares away from the walls in back and front. This allows plenty of room = no routing issues.

I usually check to make sure I've placed the stairs correctly, by going up to ground level and check placement.


MrsFlynn

  • Forum Goddess
  • Administrator
  • Ultimate Townie
  • *****
  • Posts: 2902
  • Come to the dark side... We've got cookies 🍪🍪 ☕
H2B ~ Placing the Foundation
« Reply #4 on: June 19, 2021, 12:32:40 AM »
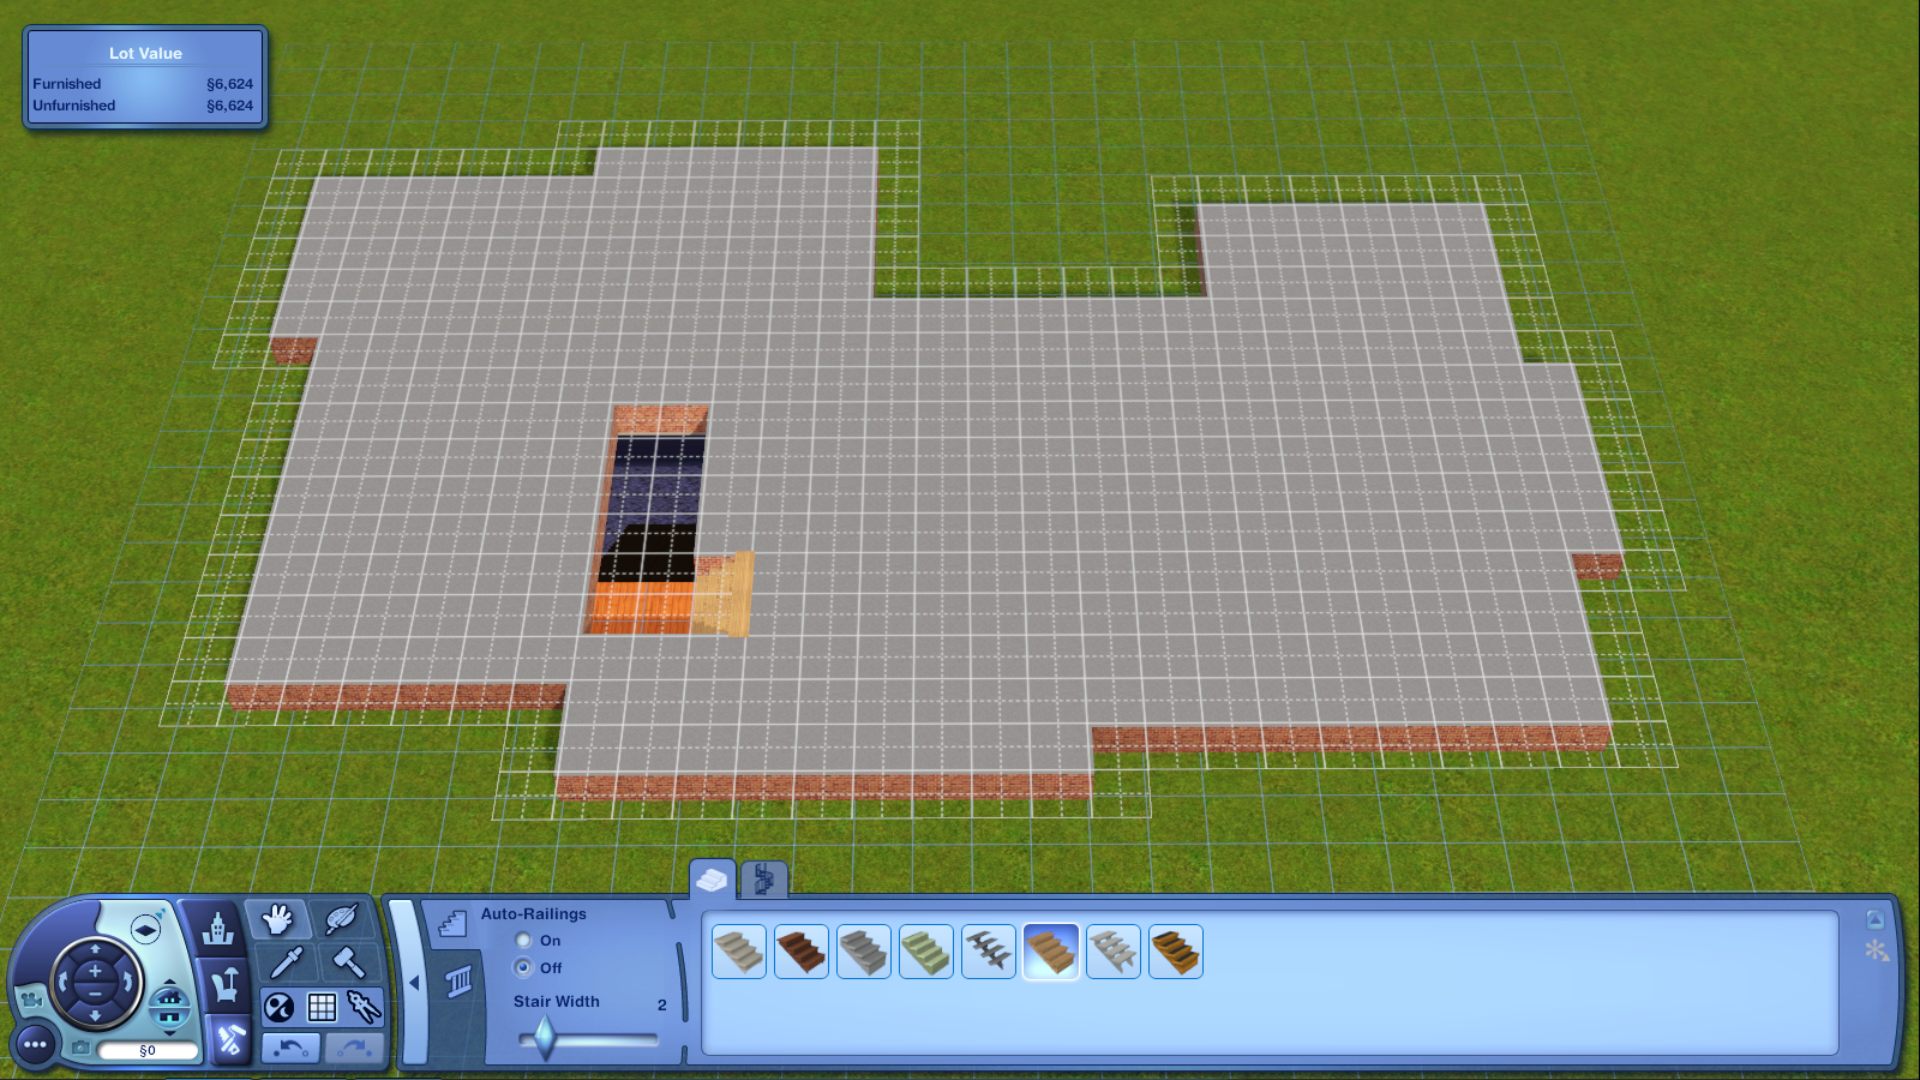
6.) Now to place the foundation. Be careful not to cover your staircase or landing. (Used orange free wood flooring to show staircase and landing)
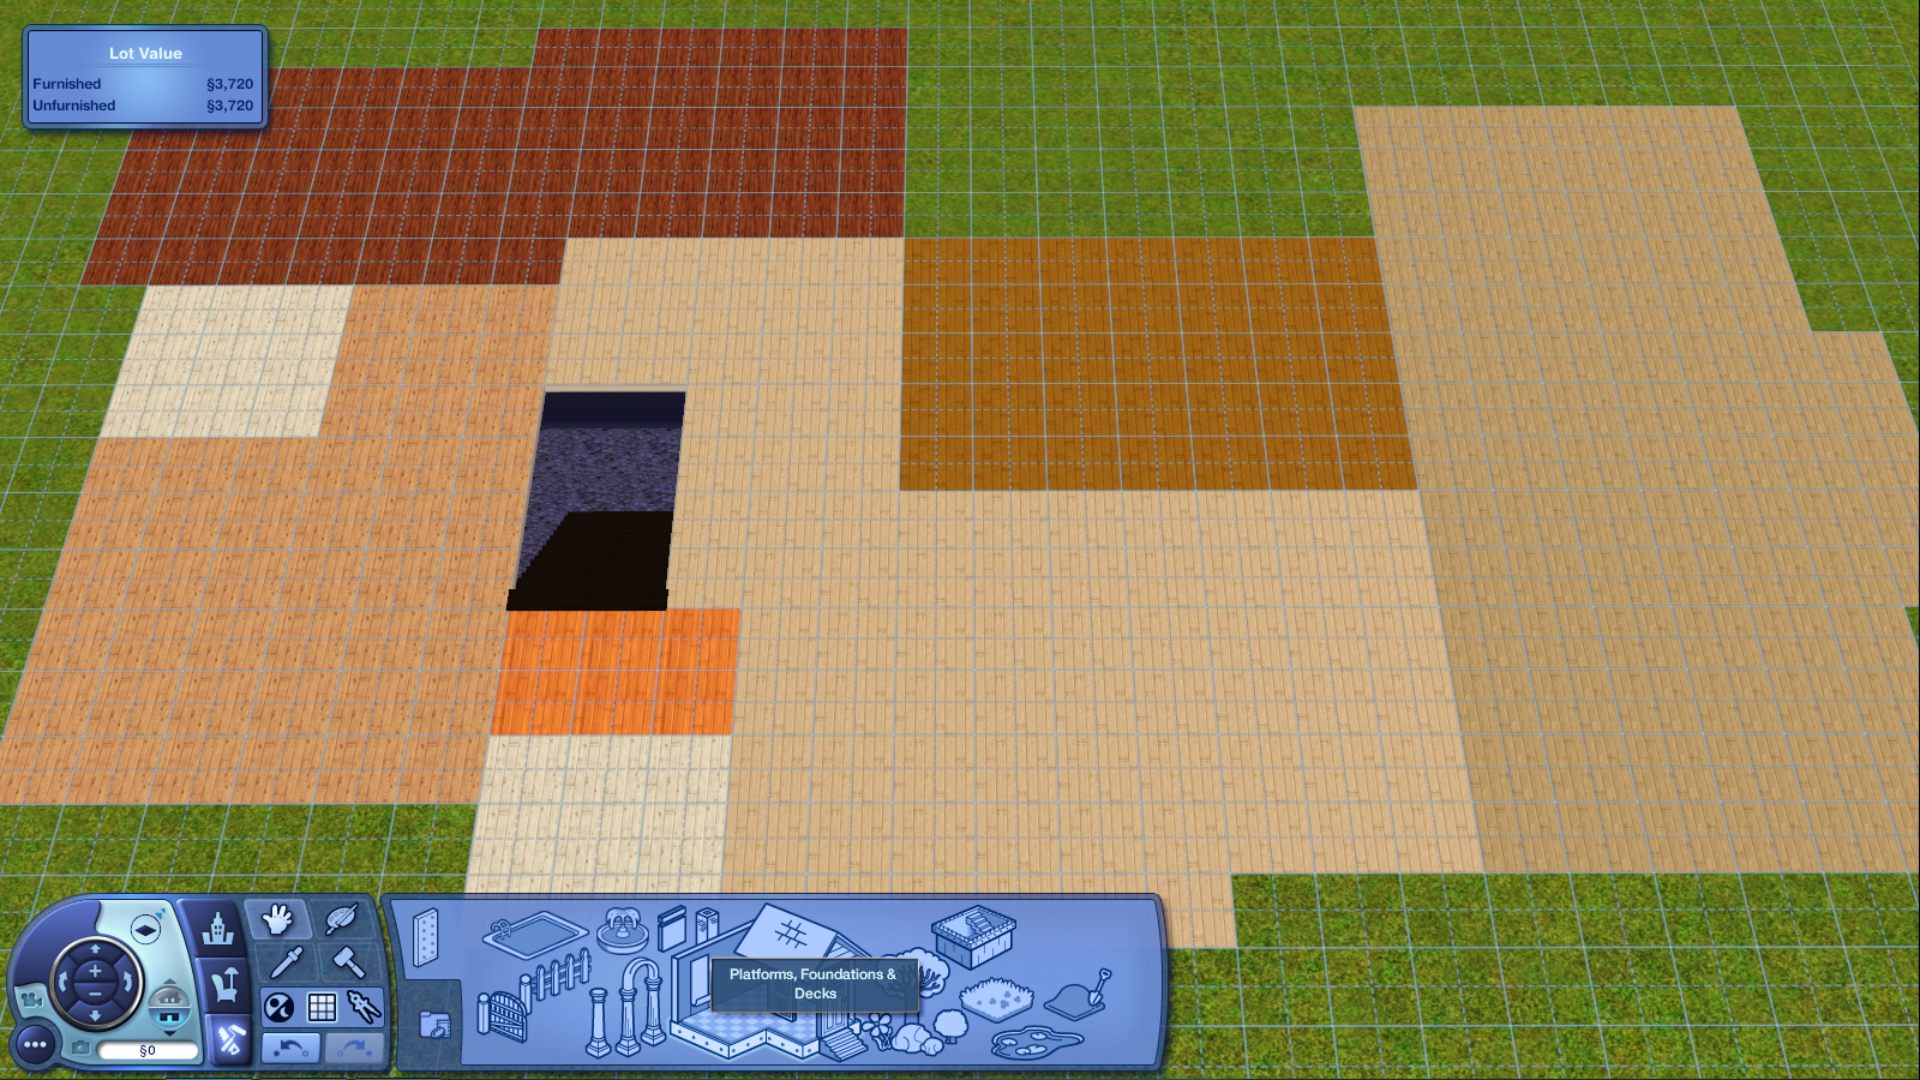
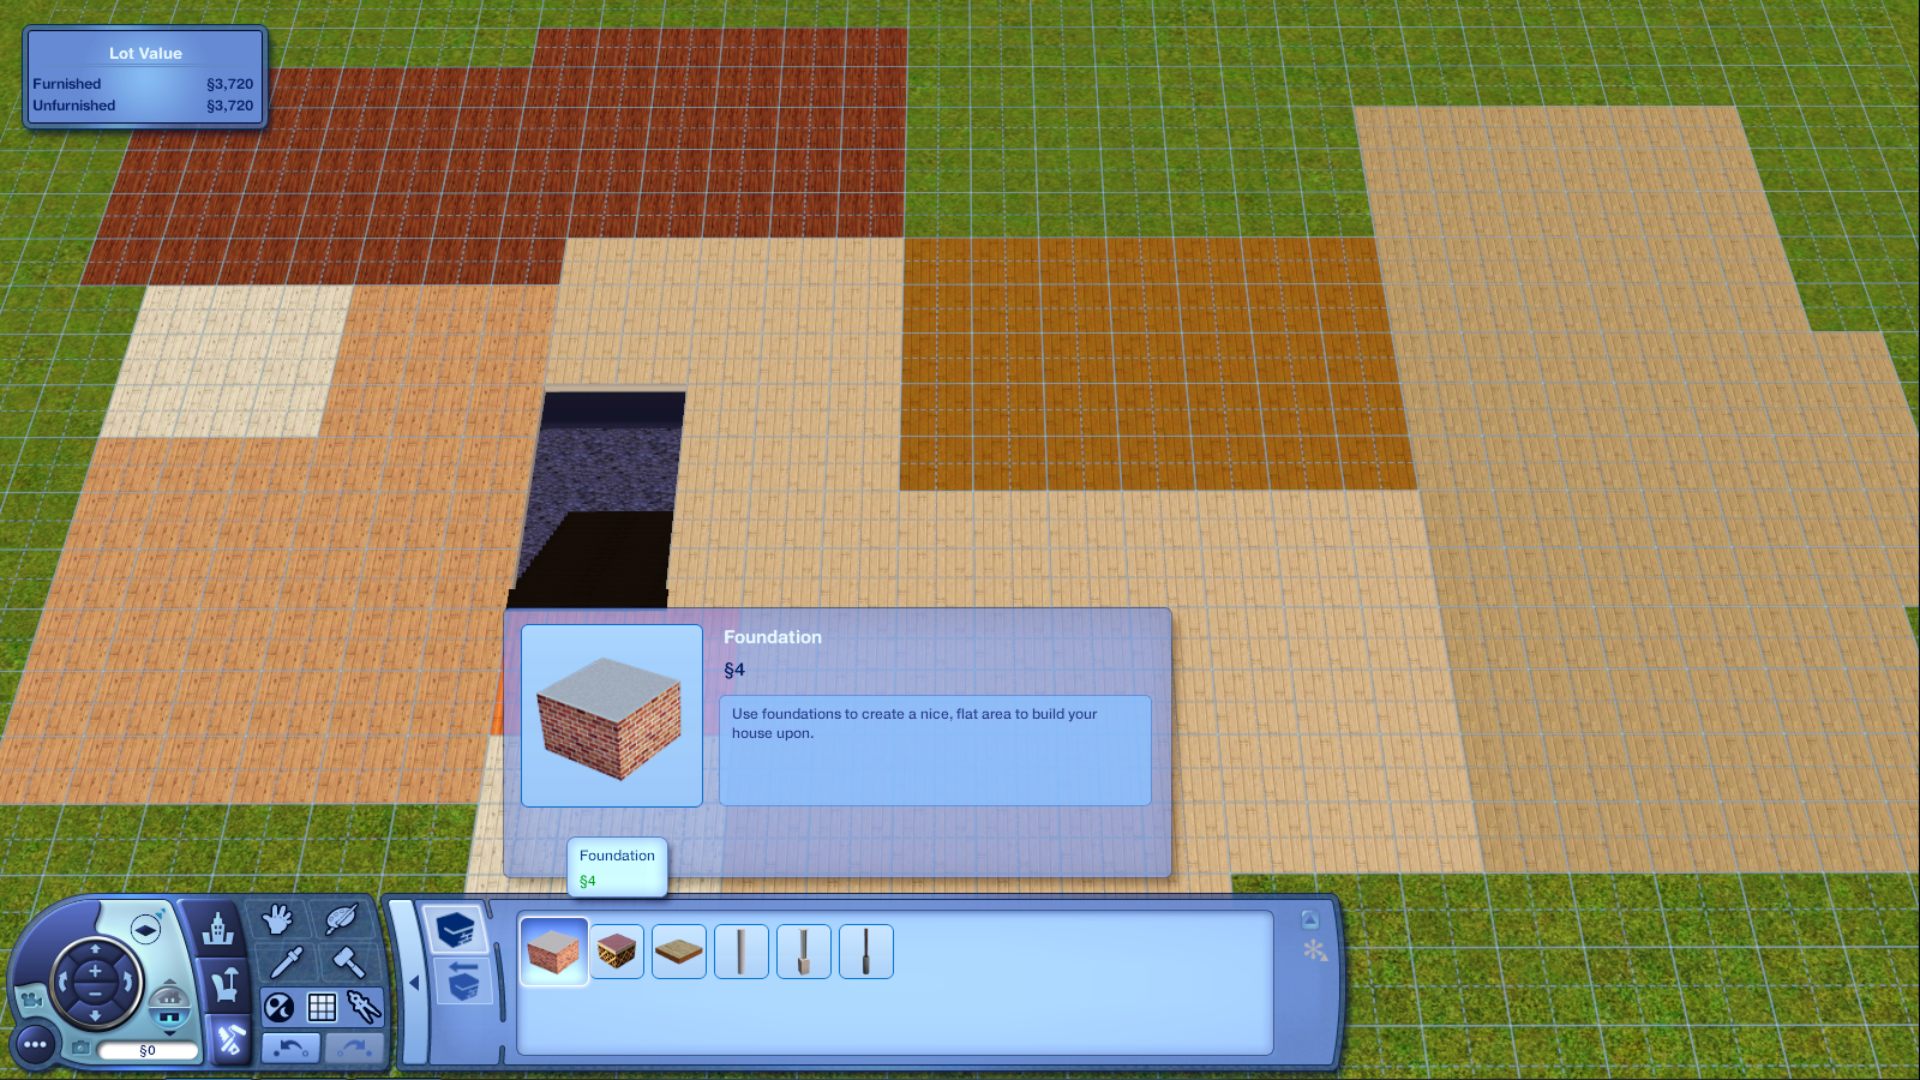
 

To place the foundation, select the foundation and hold the left mouse button down, while dragging it. To delete mistakes, press the left mouse button and Ctrl together while dragging it.
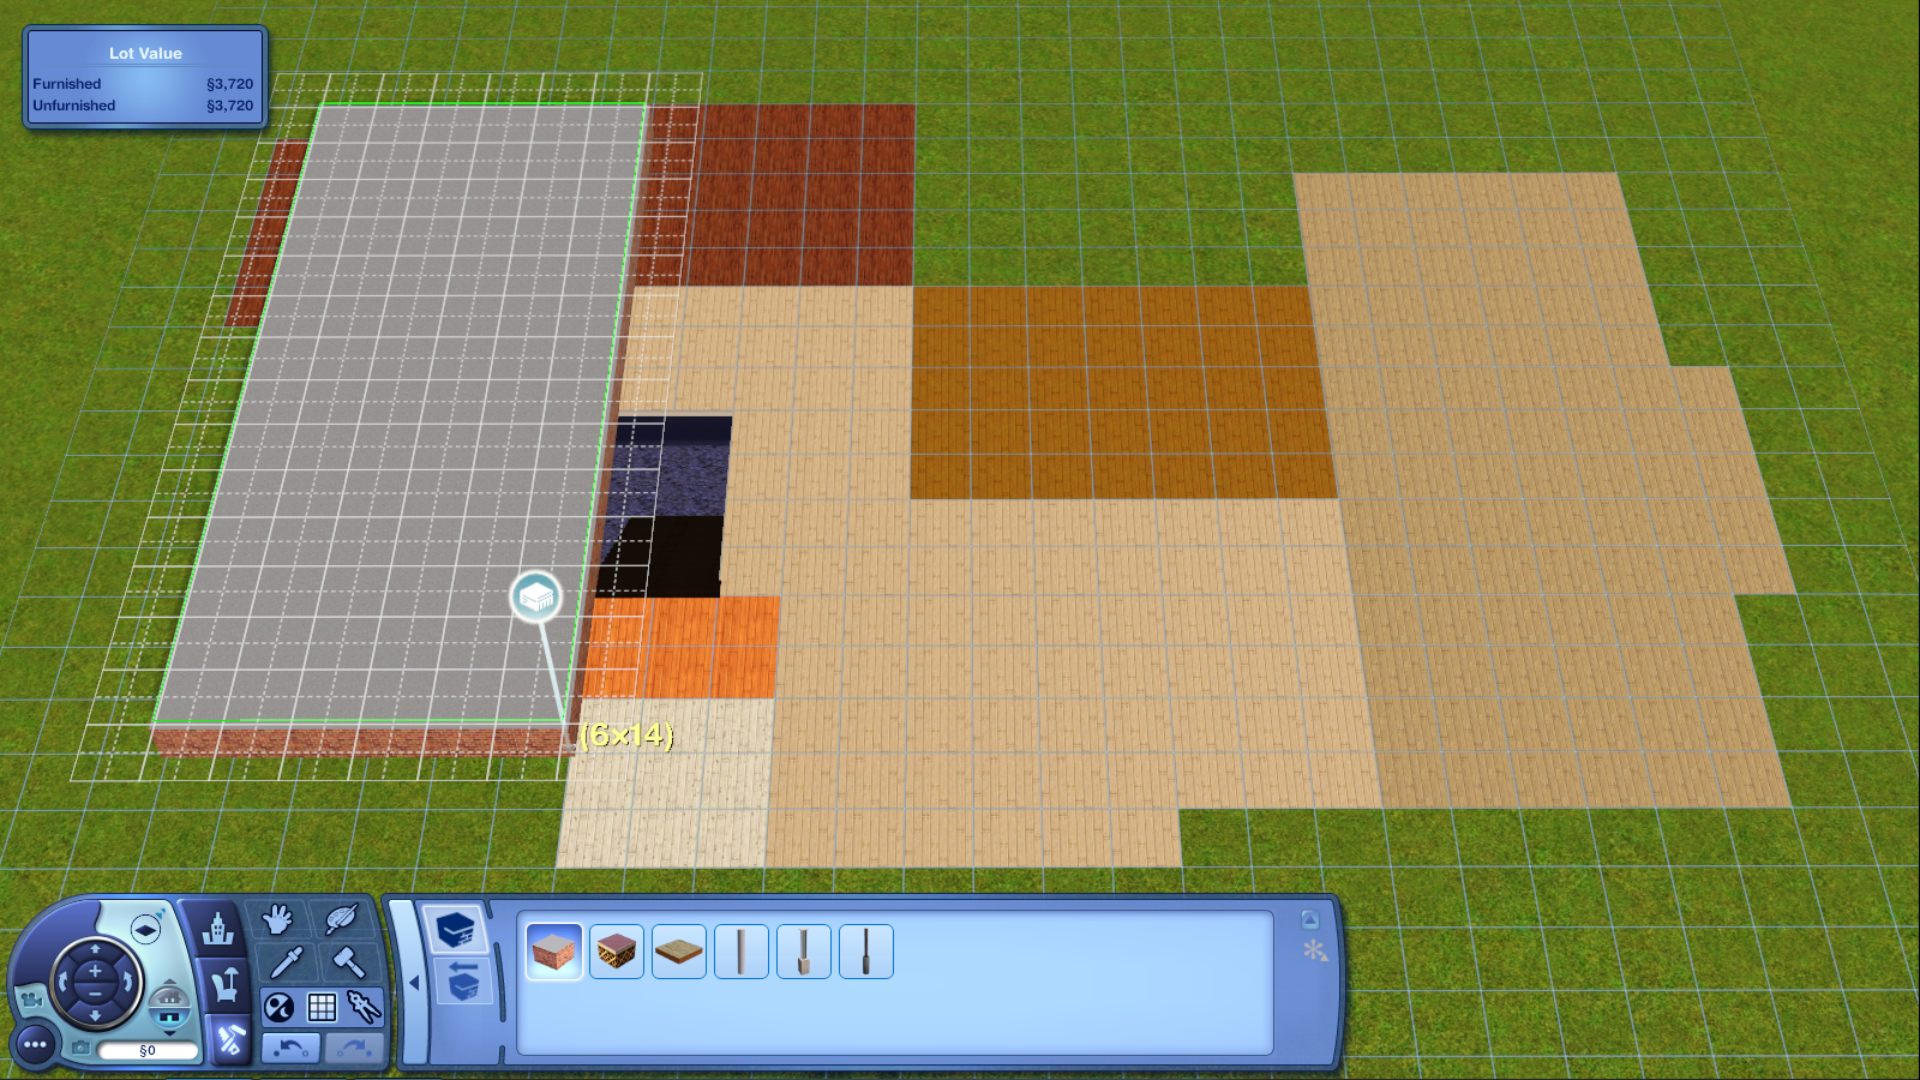
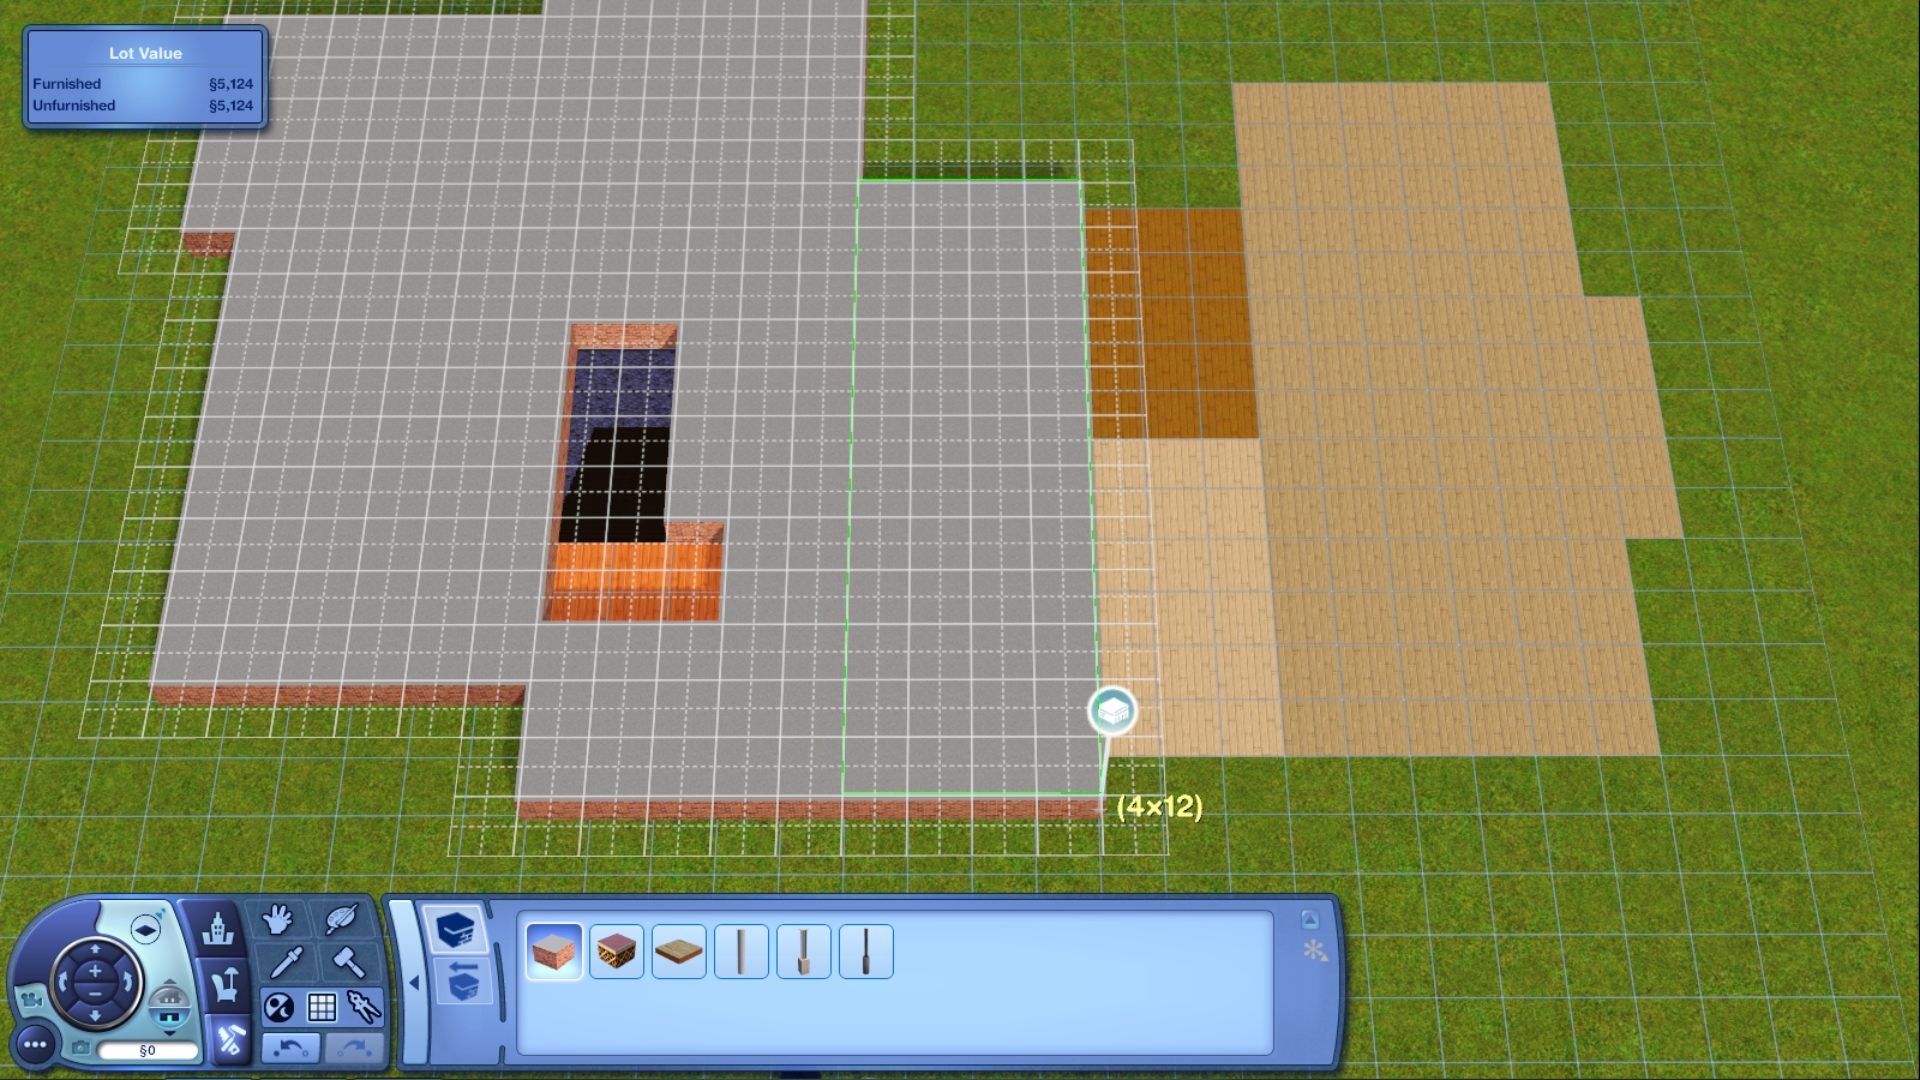
 

You can place foundation over the place where you want stairs to go upstairs. But don't cover up the landing or staircase for the basement. As shown in the photo below:


----

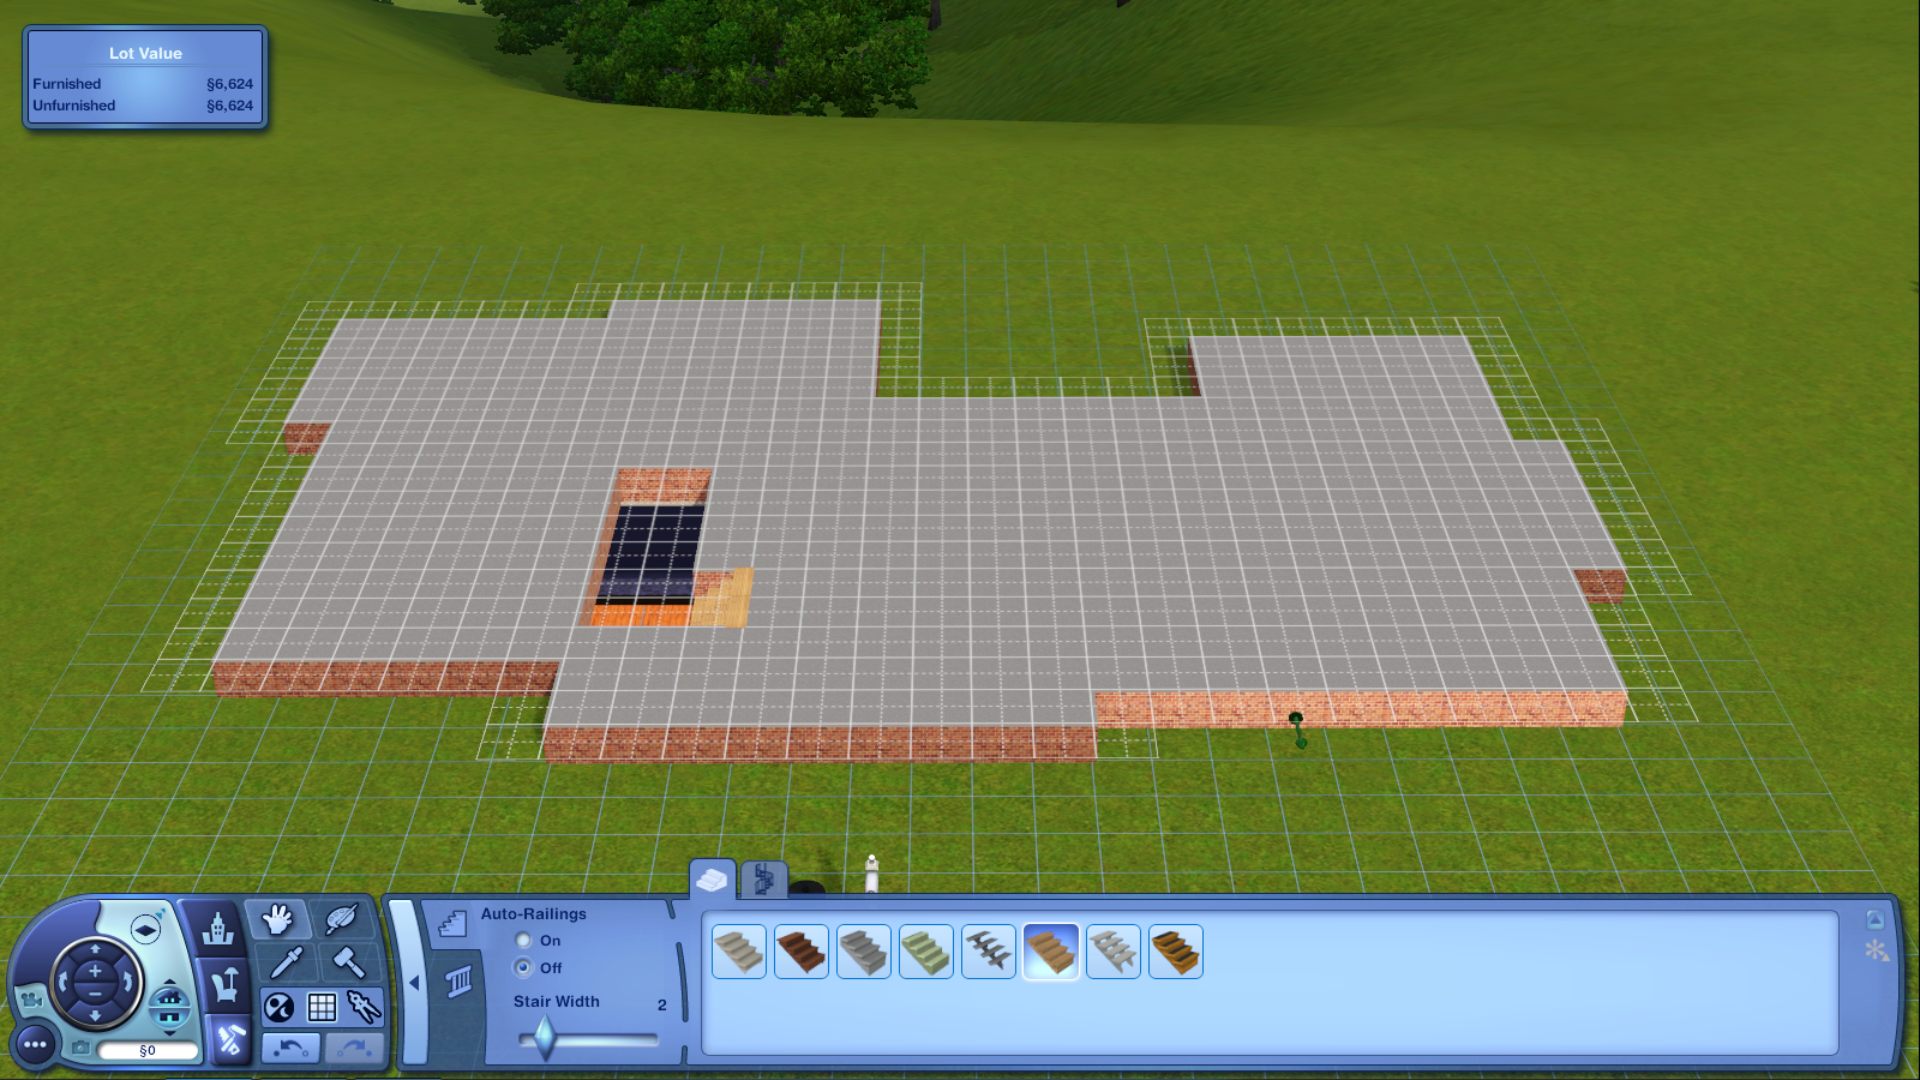
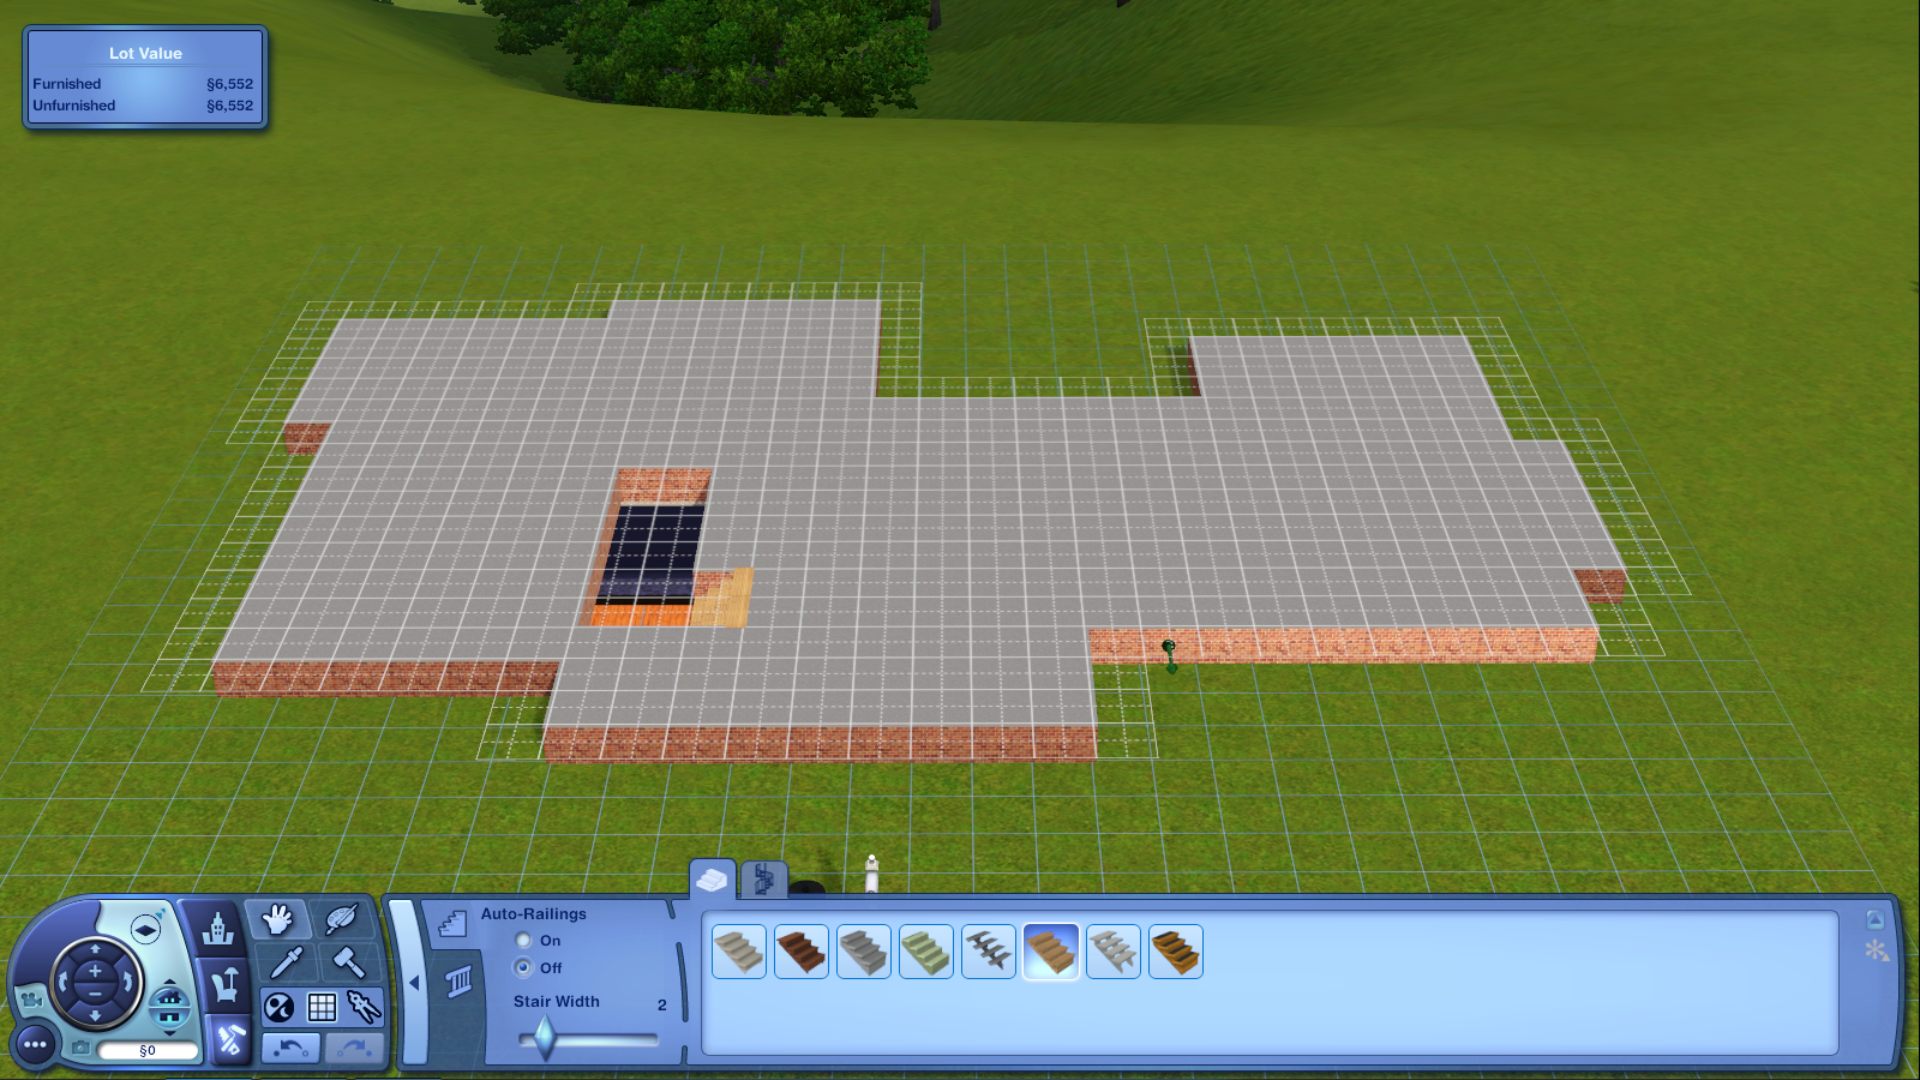
Tip #6: To make edits to the foundation, use the hand tool and hold the mouse pointer over the foundation you want to move, and push/pull the arrow to edit the foundation. You can do the same with the walls.
   

----

Tip #7: Make any edits you want to the foundation now before adding walls and more stories or floors. As it may be a major hassle to try to edit the foundation/house after it's been fully built, furnished and decorated.


If you find you want to add on after the house fully built you may need the build cheat ConstrainFloorElevation and/or other build cheats to be able to renovate the house.

I usually keep a copy of the original unfurnished house just for this reason. I find that the easiest way to renovate the house if need be.

MrsFlynn

  • Forum Goddess
  • Administrator
  • Ultimate Townie
  • *****
  • Posts: 2902
  • Come to the dark side... We've got cookies 🍪🍪 ☕
H2B ~ Drawing Out the Walls
« Reply #5 on: June 19, 2021, 01:59:25 PM »
7.) Draw out the walls, place the stairs in the landing and to the 2nd floor, make room and foundation adjustments as desired/needed. 


Use the left-mouse click and right/left arrows on keyboard to rotate the stairs.
Use Left-mouse-click and drag to move the foundation and walls.

Hold the Left-mouse button down, while using the hand tool to drag the foundation in or out. You can do this with walls as well.

MrsFlynn

  • Forum Goddess
  • Administrator
  • Ultimate Townie
  • *****
  • Posts: 2902
  • Come to the dark side... We've got cookies 🍪🍪 ☕
H2B ~ Building the Basement
« Reply #6 on: June 19, 2021, 02:14:27 PM »
8.) Build the rest of the basement by going to ground level and selecting the basement tool to draw out the rest of the basement. Think of it as coloring the inside of the foundation Blue.
 
Use the floor down button to get to ground level. I usually use free flooring to cover the ground under the foundation.


MrsFlynn

  • Forum Goddess
  • Administrator
  • Ultimate Townie
  • *****
  • Posts: 2902
  • Come to the dark side... We've got cookies 🍪🍪 ☕
H2B ~ Finishing the Basement
« Reply #7 on: June 19, 2021, 04:27:05 PM »
9.) Then back down to basement level to add flooring and walls if desired or leave it open for later additions.


To make edits to the outer basement walls or to delete parts of the basement, go to ground level using the basement tool - hold the left-mouse-button and Ctrl key down and drag to delete outside walls.
   
 -- Once you're finished with the basement, you can finish the rest of the house.

  ----

Informational Links:

If you're good with building cheats, here's a how-tos from Karritz placing stairs inside a foundation.

Tutorial - Place Stairs Inside a Foundation
https://www.youtube.com/watch?v=FbtfU3G6-lw

Building Stairs and Elevators
https://www.carls-sims-3-guide.com/buildedit/houses/multilevel/stairs.php

Making Homes with Multiple Stories and Basements
https://www.carls-sims-3-guide.com/buildedit/houses/multilevel/